Caring for Cast Iron + { Recipe } Skillet Cornbread
Just one post last week. Seriously?
Where have I been, you ask?
I wish I could blame it on my day job.
Or freelance overload.
Or out-of-town guests.
Or tell you that I was abducted by aliens.
Or that it's because my kitchen was swallowed up by a black hole and I've been living on takeout.
But, alas, it’s none of these. Truth be told, the excuse is a bit frivolous, really.
The real reason Confessions of a Foodie had only one post last week is …
Drumroll puh-leezzz …
Netflix.
More specifically, my (late) discovery of the NBC drama, “Friday Night Lights.”
“FNL?” you ask.
Yuppers.
I never in a million years would have thought that I’d ever get so caught up in a series that on the surface was about nothing more than a bunch of high school jocks. It held zero interest for me during it’s run on network television.
But in the same week it became recommended viewing on Netflix, I also saw a tweet about it in my Twitter feed and I decided it was a sign. Plus, after just having finished viewing the last season of “The Tudors,” I was eager to find another engrossing drama.
I just hadn’t counted on finding one that would wind up being quite THIS time-sucking, can’t seem to turn it off engrossing. And I gotta say, the first episode didn’t grab me. I had to watch it twice. But half-way through episode two, I was hooked.
So last week disappeared on me faster than I could say “I’ll have a quad shot extra hot nonfat latte, please.” Because, seriously, a quad shot is what I needed in the morning after watching the show back to back all last weekend and almost every night this past week into the wee hours of the morning.
This show created a monster.
Such a monster that I was quite upset to find that Netflix only had seasons 1-4 and that there was a fifth season and that NBC only had the last five episodes of season five available on their site so I watched it there and grew exasperated with the commercials (I swear they up the volume for those dangnamit things!) but I HAD to know how it all ended so I watched them even though I missed most of the season prior to those last five episodes.
Phew! That was quite the run-on sentence but that’s how passionate I became watching this show that made me root (I hate football, but I rooted anyway) and cry and think and wish I had a relationship like Coach Taylor and his wife Tami.
But I made it through and have come out the other side.
Hello. My name is Ani and I’m a Netflix addict.
Welcome, Ani.
{ And now, back to our regularly scheduled programming. … So to speak. Hehehe. }
Cast Iron Dreaming
One of my favorite, and most often used, tools in the kitchen has to be my cast iron skillet. I absolutely love it! It makes the best fried eggs and omelets. It provides quick and excellent searing on steaks that can then be put directly into the oven to finish pan roasting. It’s also excellent for dry toasting seeds, nuts and herbs.
The beauty of cast iron is two-fold: it conducts heat evenly and with proper care and use, develops it’s own nonstick (or, a-hem, “low” stick) cooking surface.
Seasoning a new cast iron pan
My Lodge cast iron skillet and griddle I bought brand new before Lodge released their pre-seasoned line of products. If you buy one that needs seasoning, it’s really easy to do:
Using cast iron
The best way to use your pan is to begin by wiping your cooking oil on the cooking surface of a pan with paper towels. Then use add desired amount of cooking oil to the pan, place on low heat for the first couple of minutes, slowly turning it up to medium heat until it comes up to the proper cooking temperature. Always allow the pan to come to temp slowly. Once your pan reaches the desired temp, you're ready to start cooking. Remember, cast iron gets very hot. Never touch the handle without proper pot holder or pan handle cozy.
Caring for cast iron
A beautiful, well cared for cast iron pan will become even more seasoned – smoother, blacker – with regular use. And as it becomes more seasoned, it will become naturally nonstick. But it won’t become this way if you make the biggest mistake so many cast iron novice users make in caring for it: washing your cast iron with soap or using an abrasive sponge to scrub off burnt on food. Doing either of these will remove the seasoning (and any nonstick properties you’ve built up) from the pan forcing you to start the seasoning process all over. It’s at this point, that most cast iron haters have given up and moved on to other types of cookware.
To help ensure a good return on your investment, here are my tips for clean up:
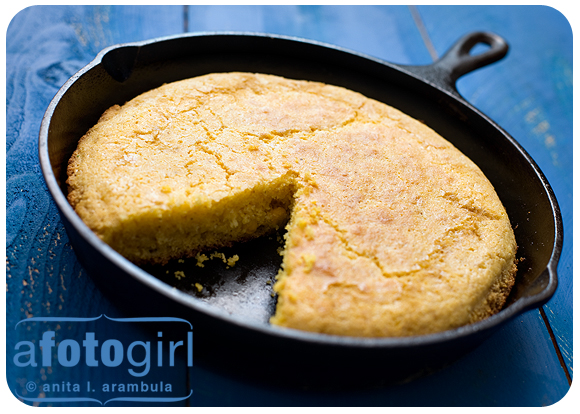
Skillet Cornbread is quick, easy and tasty
I first saw the recipe for Skillet Cornbread over at Pioneer Woman. It was love at first read. I've made some tweak's to Ree's recipe because I love to bit into real corn kernels in my cornbread.
Ready? Let's get baking.
Add cornmeal and all-purpose flour to a large mixing bowl.
Add one teaspoon salt.

Add 1 tablespoon baking powder.
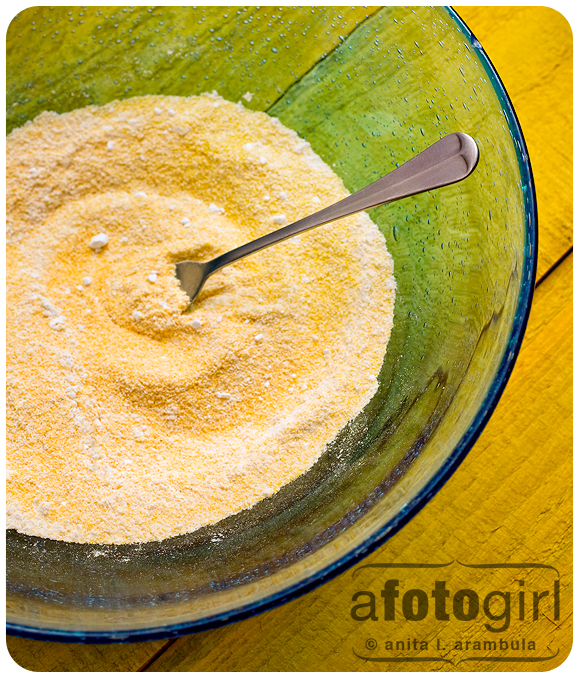
Use a fork to stir. See those lumps? Lumps bad. Use the fork to break 'em up until…

those lumpy bumpies are all gone and the dry ingredients are nicely combined.
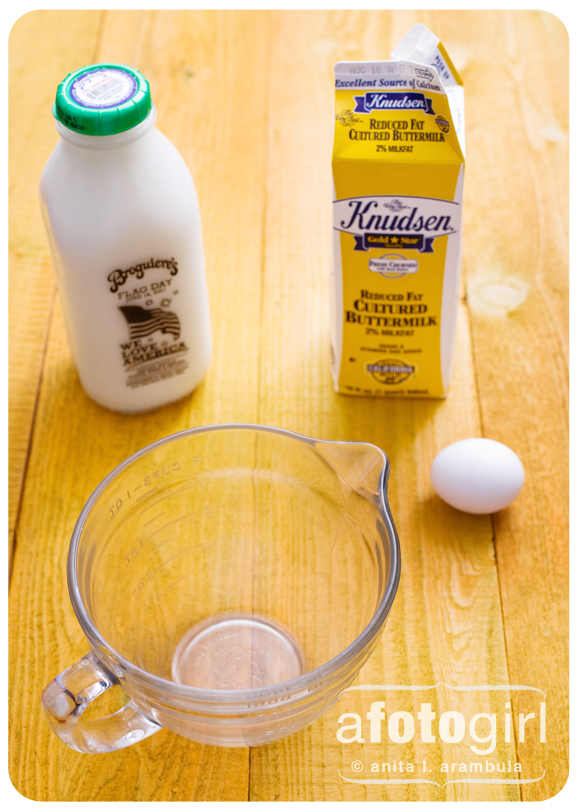
Next up, dairy goodness: milk (I happen to drink nonfat but you can use whole or lowfat), buttermilk and one large egg.
Add the milk, buttermilk and egg to a bowl.
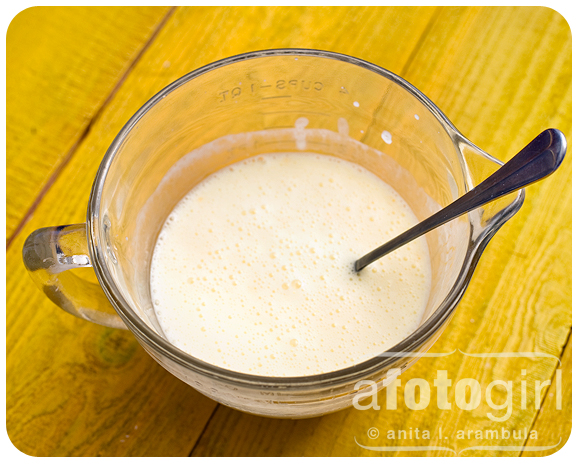
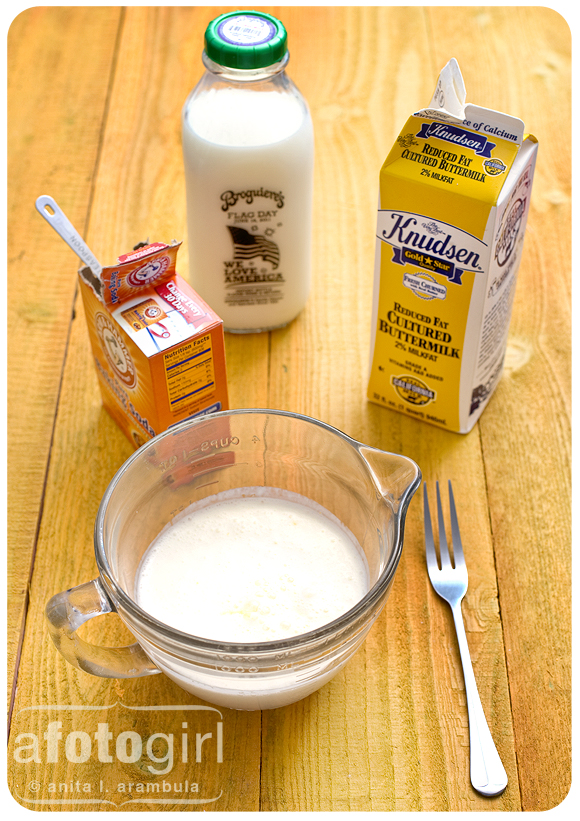
Whisk it baby, whisk!
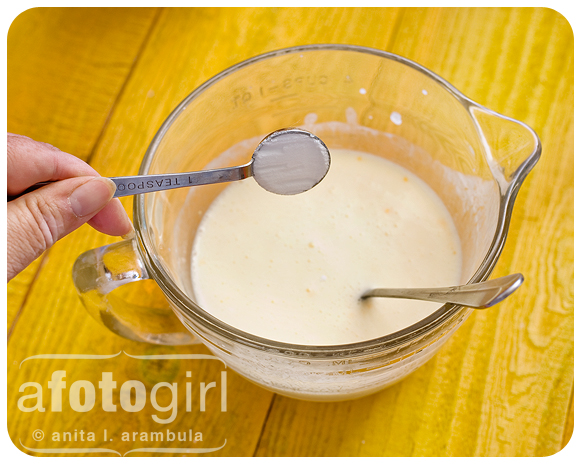
Add 1 level teaspoon of baking soda to the milk mixture and whisk again.
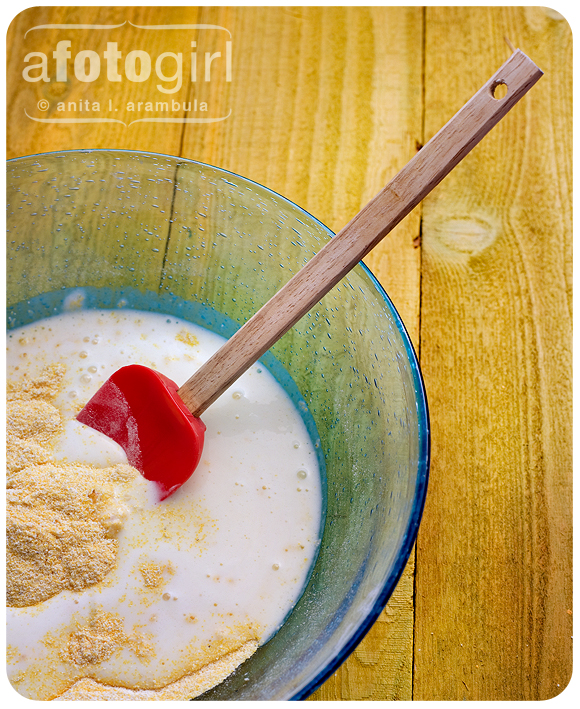
Add the wet ingredients to the flour bowl.
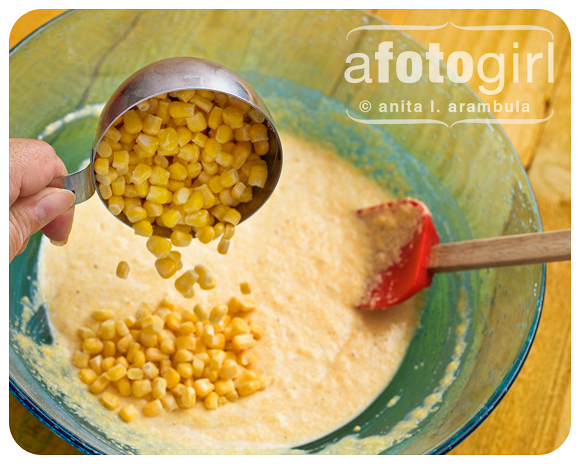
Add 1 cup of frozen whole kernel corn and stir to combine.
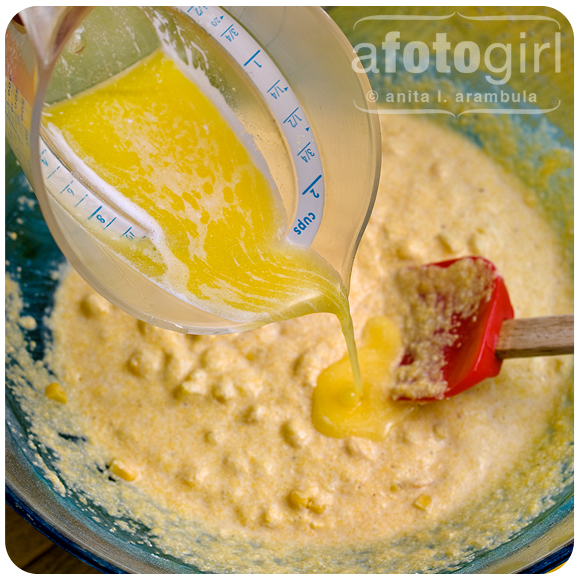
Stir in melted butter.
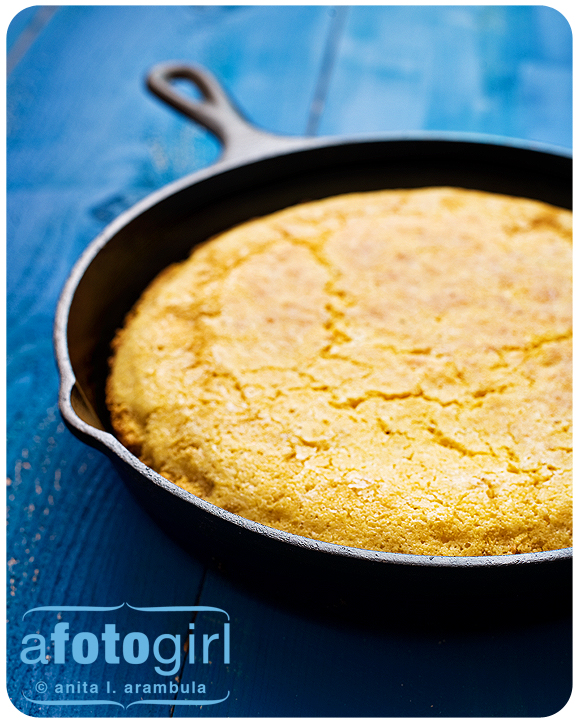
Slowly warm up your cast iron skillet. Mine is 10 inches so my cornbread was a bit on the thin side. I like it thicker so if your pan is 8 1/2 inches, you'll have thicker bread.
I'm jealous.
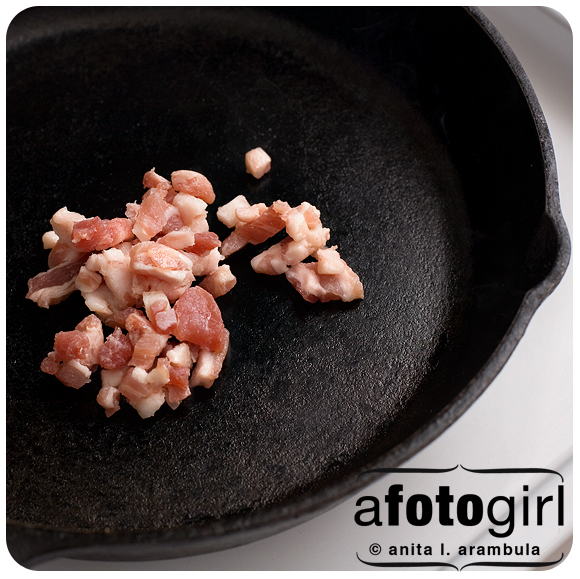
Add pancetta to the pan and render out the fat. Once rendered, remove thebacon pancetta bits. If they aren't too terrible burnt, save 'em to add to your scrambled eggs the next morning. Trust me. Yum.
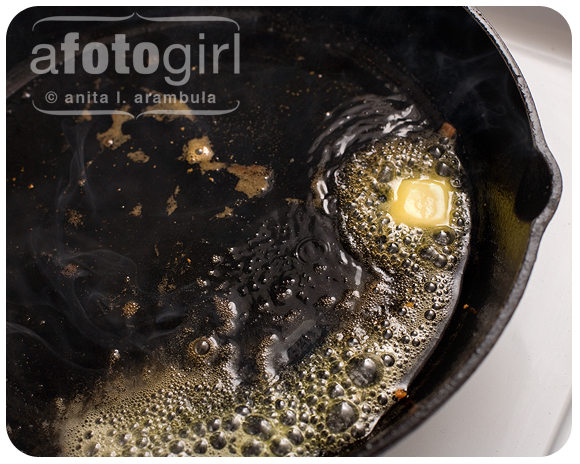
Add butter or shortening to the pan and melt. Now the next time I do this, I'm using Crisco shortening instead of the butter for this step. The butter made for REALLY crispy crust.
A bit too crispy for my liking though I hear it's preferred this crispy by most southerners.
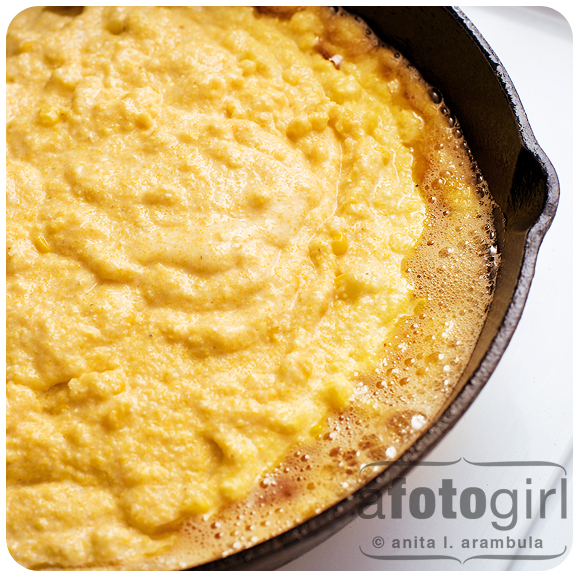
Carefully add batter. Even it out with a spoon. Cook on the stovetop for 1 minute then transfer to a preheated oven and bake for 20-25 minutes or until a toothpick inserted comes out clean.
Oh! Yeah! Baby! Bring on the BBQ!
Skillet Cornbread
INGREDIENTS
1 cup Yellow Cornmeal
1/2 cup all-purpose flour
1 teaspoon salt
1 tablespoon baking powder
1 cup buttermilk
1/2 cup milk
1 egg
1/2 teaspoon baking soda
1 cup whole kernel frozen corn
1/2 cup butter
1 1/2 tablespoons pancetta
2 Tablespoons butter or shortening
METHOD
Where have I been, you ask?
I wish I could blame it on my day job.
Or freelance overload.
Or out-of-town guests.
Or tell you that I was abducted by aliens.
Or that it's because my kitchen was swallowed up by a black hole and I've been living on takeout.
But, alas, it’s none of these. Truth be told, the excuse is a bit frivolous, really.
The real reason Confessions of a Foodie had only one post last week is …
Drumroll puh-leezzz …
Netflix.
More specifically, my (late) discovery of the NBC drama, “Friday Night Lights.”
 |
| The beautiful Tami Taylor who plays a guidance counselor and West Dillon High and her compassionate husband, Coach Eric Taylor. NBC only has the last five episodes online and they're only available until September 18, 2011. I think I see a DVD purchase come Black Friday. (Screen capture of nbc.com's FNL site.) |
“FNL?” you ask.
Yuppers.
I never in a million years would have thought that I’d ever get so caught up in a series that on the surface was about nothing more than a bunch of high school jocks. It held zero interest for me during it’s run on network television.
But in the same week it became recommended viewing on Netflix, I also saw a tweet about it in my Twitter feed and I decided it was a sign. Plus, after just having finished viewing the last season of “The Tudors,” I was eager to find another engrossing drama.
I just hadn’t counted on finding one that would wind up being quite THIS time-sucking, can’t seem to turn it off engrossing. And I gotta say, the first episode didn’t grab me. I had to watch it twice. But half-way through episode two, I was hooked.
So last week disappeared on me faster than I could say “I’ll have a quad shot extra hot nonfat latte, please.” Because, seriously, a quad shot is what I needed in the morning after watching the show back to back all last weekend and almost every night this past week into the wee hours of the morning.
This show created a monster.
Such a monster that I was quite upset to find that Netflix only had seasons 1-4 and that there was a fifth season and that NBC only had the last five episodes of season five available on their site so I watched it there and grew exasperated with the commercials (I swear they up the volume for those dangnamit things!) but I HAD to know how it all ended so I watched them even though I missed most of the season prior to those last five episodes.
Phew! That was quite the run-on sentence but that’s how passionate I became watching this show that made me root (I hate football, but I rooted anyway) and cry and think and wish I had a relationship like Coach Taylor and his wife Tami.
But I made it through and have come out the other side.
Hello. My name is Ani and I’m a Netflix addict.
Welcome, Ani.
{ And now, back to our regularly scheduled programming. … So to speak. Hehehe. }
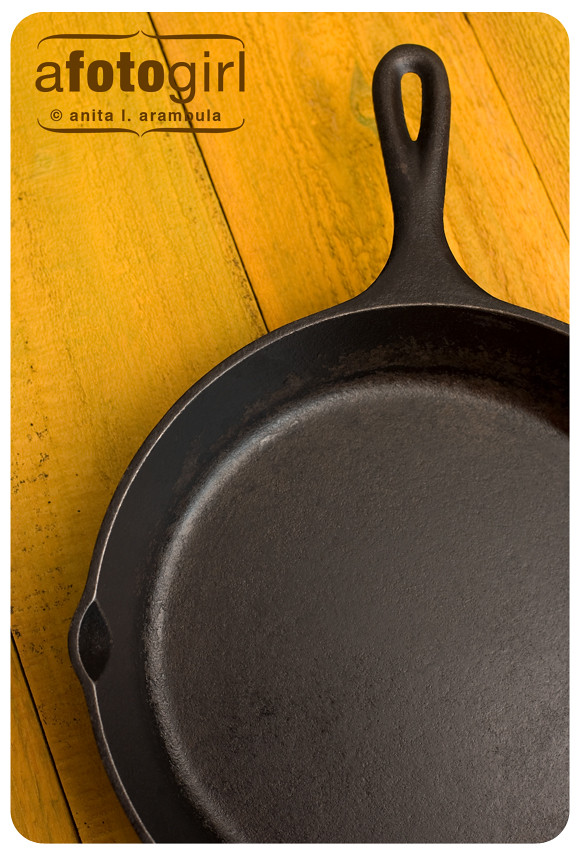 |
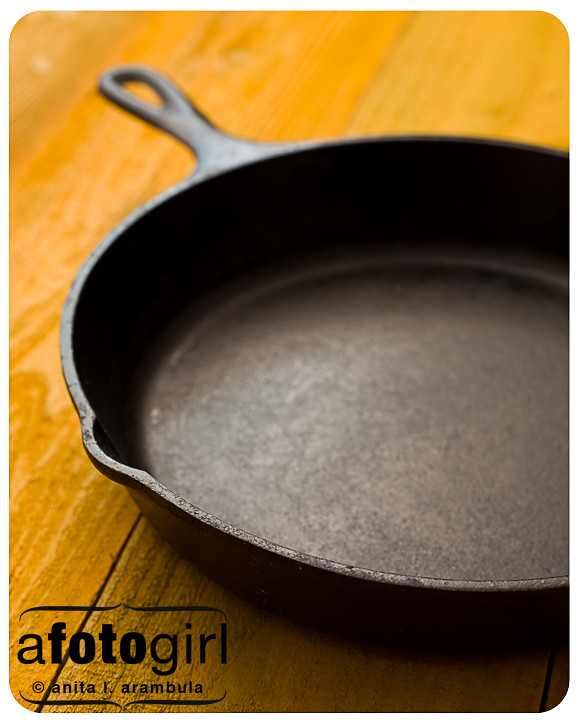
| I've had this cast iron pan for more than twenty years. It has survived many a roommate unfamiliar with caring for cast iron. This pan is so resilient! And it just keeps getting better. |
Cast Iron Dreaming
One of my favorite, and most often used, tools in the kitchen has to be my cast iron skillet. I absolutely love it! It makes the best fried eggs and omelets. It provides quick and excellent searing on steaks that can then be put directly into the oven to finish pan roasting. It’s also excellent for dry toasting seeds, nuts and herbs.
The beauty of cast iron is two-fold: it conducts heat evenly and with proper care and use, develops it’s own nonstick (or, a-hem, “low” stick) cooking surface.
Seasoning a new cast iron pan
My Lodge cast iron skillet and griddle I bought brand new before Lodge released their pre-seasoned line of products. If you buy one that needs seasoning, it’s really easy to do:
- Place two racks in the oven. Place a cookie sheet lined with aluminum foil on the center of bottom rack.
- Using a paper towel, apply a thin even coat of lard, bacon fat or solid vegetable shortening (Crisco is a good choice) to the cooking surface of your pan. Do not use any kind of liquid oil or nonstick spray as the burning point on these are not high enough and will leave a sticky, gummy residue on the surface. Be sure to go all the way up the sides of the pan.
- Place the pan in the oven upside down on the top rack centered over the cookie sheet. Turn the oven on and set the temperature to 400˚ F.
- Bake for one hour.
- Turn off the oven and leave the pan in the oven to cool.
- Remove pan from oven. Carefully wipe with paper towels. Your cast iron pan is now seasoned and ready to use.
Using cast iron
The best way to use your pan is to begin by wiping your cooking oil on the cooking surface of a pan with paper towels. Then use add desired amount of cooking oil to the pan, place on low heat for the first couple of minutes, slowly turning it up to medium heat until it comes up to the proper cooking temperature. Always allow the pan to come to temp slowly. Once your pan reaches the desired temp, you're ready to start cooking. Remember, cast iron gets very hot. Never touch the handle without proper pot holder or pan handle cozy.
Caring for cast iron
A beautiful, well cared for cast iron pan will become even more seasoned – smoother, blacker – with regular use. And as it becomes more seasoned, it will become naturally nonstick. But it won’t become this way if you make the biggest mistake so many cast iron novice users make in caring for it: washing your cast iron with soap or using an abrasive sponge to scrub off burnt on food. Doing either of these will remove the seasoning (and any nonstick properties you’ve built up) from the pan forcing you to start the seasoning process all over. It’s at this point, that most cast iron haters have given up and moved on to other types of cookware.
To help ensure a good return on your investment, here are my tips for clean up:
- After cooking and removing all food from the pan, immediately wipe the interior of the pan with a wadded up wet paper towel, careful not to burn yourself in the process as the pan will still be hot. Then turn the heat back on to high and let the pan heat up for five minutes to burn off any moisture. Turn off the heat. Add about 1/2 teaspoon of oil and use a paper towel to rub it over any surface of the pan that might come into contact with food and then continue to buff it out with a clean paper towel. This will provide a “shield” from air moisture that could allow rust to form on the pan while in storage awaiting it’s next use. 90% of the time, this is all that needs to be done.
- If your pan is a little crustier and a paper towel wipe down is not enough, you can add some water to cover the bottom of the pan, bring it to a boil and use a wooden spoon to carefully loosen up the burnt on food. As soon as it’s loosened though, stop and carefully dump out the hot water then proceed with the instructions above to burn off moisture and provide a rust shield.
- If you're uncomfortable with just wiping out the pan as in step one above, use a stiff nylon brush to clean the pan under HOT running water. Never place a hot pan in cold or lukewarm water as it can cause the pan to crack. Carefully scrub with the brush but NEVER use soap.
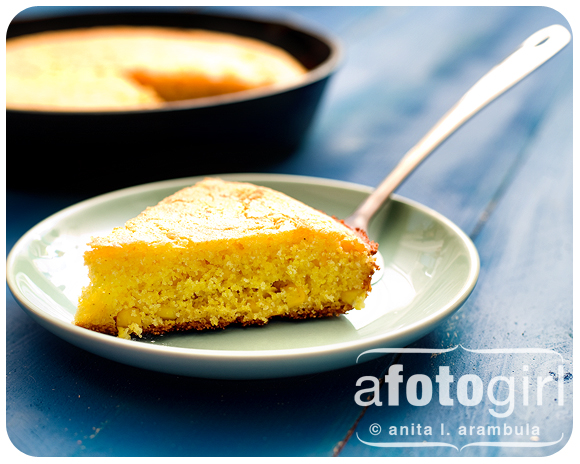
Skillet Cornbread is quick, easy and tasty
I first saw the recipe for Skillet Cornbread over at Pioneer Woman. It was love at first read. I've made some tweak's to Ree's recipe because I love to bit into real corn kernels in my cornbread.
Ready? Let's get baking.
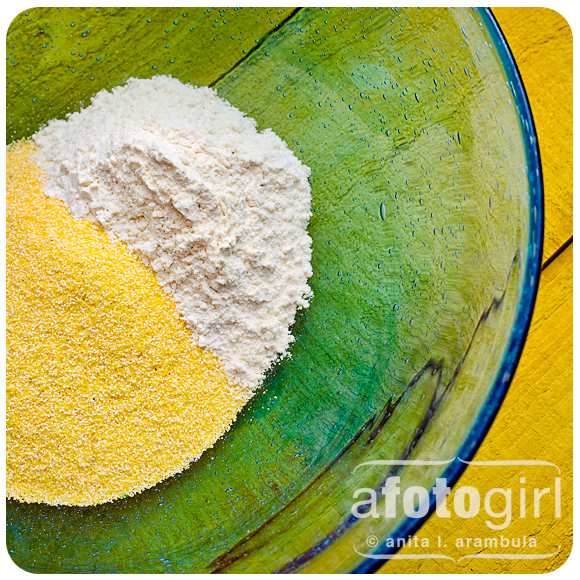
Add cornmeal and all-purpose flour to a large mixing bowl.
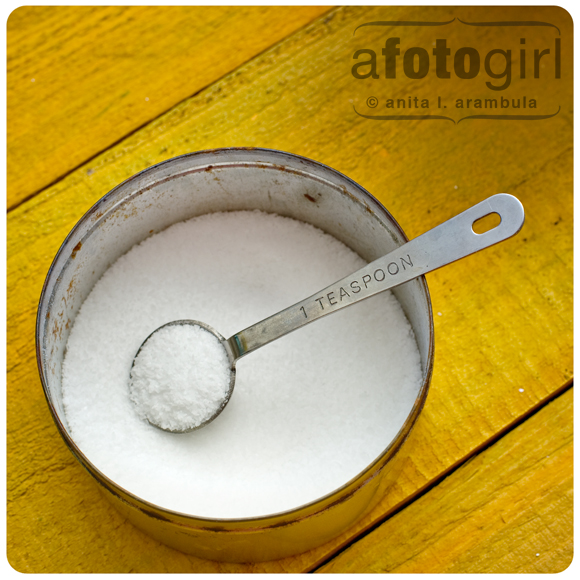
Add one teaspoon salt.
Add 1 tablespoon baking powder.
Use a fork to stir. See those lumps? Lumps bad. Use the fork to break 'em up until…
those lumpy bumpies are all gone and the dry ingredients are nicely combined.
Next up, dairy goodness: milk (I happen to drink nonfat but you can use whole or lowfat), buttermilk and one large egg.
Add the milk, buttermilk and egg to a bowl.
Whisk it baby, whisk!
Add 1 level teaspoon of baking soda to the milk mixture and whisk again.
Add the wet ingredients to the flour bowl.
Add 1 cup of frozen whole kernel corn and stir to combine.
Stir in melted butter.
Slowly warm up your cast iron skillet. Mine is 10 inches so my cornbread was a bit on the thin side. I like it thicker so if your pan is 8 1/2 inches, you'll have thicker bread.
I'm jealous.
Add pancetta to the pan and render out the fat. Once rendered, remove the
Add butter or shortening to the pan and melt. Now the next time I do this, I'm using Crisco shortening instead of the butter for this step. The butter made for REALLY crispy crust.
A bit too crispy for my liking though I hear it's preferred this crispy by most southerners.
Carefully add batter. Even it out with a spoon. Cook on the stovetop for 1 minute then transfer to a preheated oven and bake for 20-25 minutes or until a toothpick inserted comes out clean.
Oh! Yeah! Baby! Bring on the BBQ!
Skillet Cornbread
INGREDIENTS
1 cup Yellow Cornmeal
1/2 cup all-purpose flour
1 teaspoon salt
1 tablespoon baking powder
1 cup buttermilk
1/2 cup milk
1 egg
1/2 teaspoon baking soda
1 cup whole kernel frozen corn
1/2 cup butter
1 1/2 tablespoons pancetta
2 Tablespoons butter or shortening
METHOD
- Preheat oven to 450 degrees.
- Combine cornmeal, flour, salt, and baking powder in a bowl. Stir together.
- Measure the buttermilk and milk in a measuring cup and add the egg. Stir together with a fork. Add the baking soda and stir.
- Pour the milk mixture into the dry ingredients and stir until just combined. Gently stir in the corn.
- Place 1/4 shortening into a small bowl and microwave to melt. Slowly add melted shortening to the batter, stirring until just combined.
- In an iron skillet, cook the pancetta to render out the fat. Remove the pancetta bits and save for breakfast (taste yummy in scrambled eggs). Add the remaining 2 tablespoons butter or shortening to melt careful not to burn. Carefully pour the batter into the hot skillet and spread to even out.
- Cook on stovetop for 1 minute, then transfer to the oven and bake for 20 to 25 minutes or a toothpick inserted comes out clean.
I hope you enjoy the cornbread!
Until next time,
Ani


Comments
Post a Comment